Delete Icon Cache Windows 11, 10, 8, and 7 and Fix Broken Icons Easily
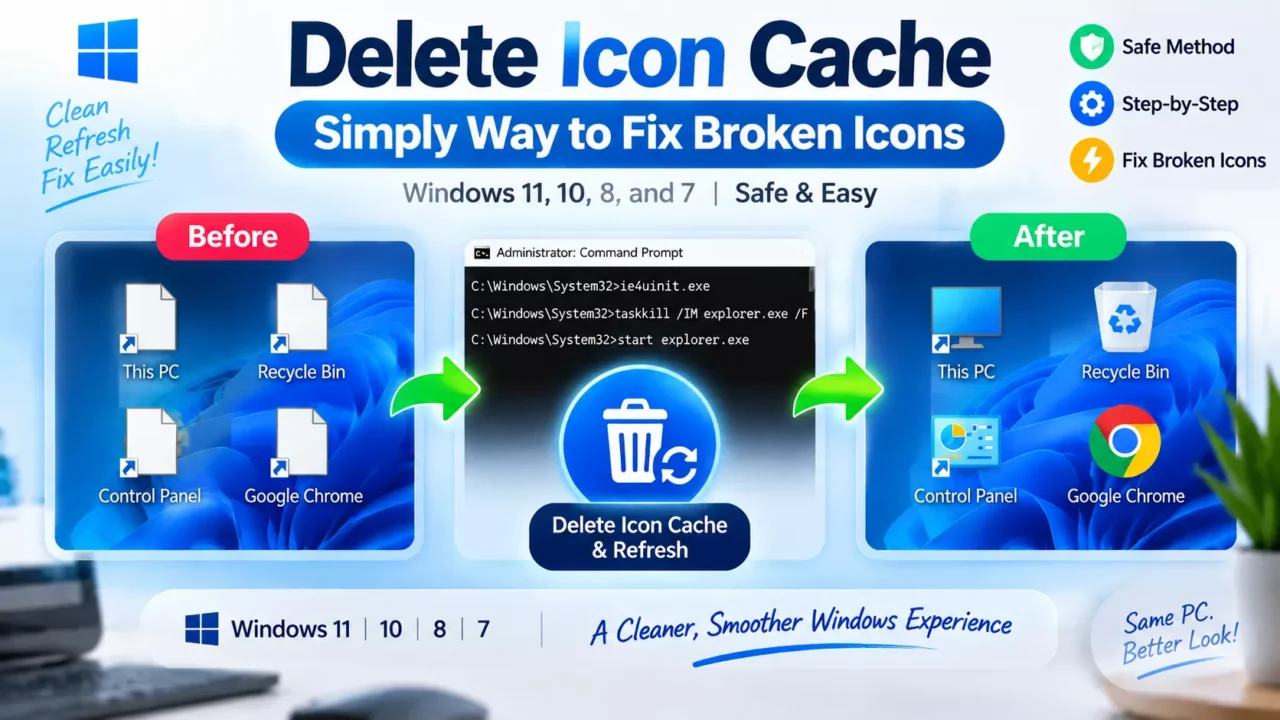
Windows uses an icon cache database to load desktop icons, File Explorer icons, application shortcuts, and folder images faster. Sometimes this cache becomes outdated or damaged, causing problems such as blank icons, incorrect program images, missing shortcuts, or icons that do not update after installing a new icon theme.
In most cases, rebuilding the icon cache is a simple and safe solution. This guide explains how to delete icon cache Windows 11, Windows 10, Windows 8, Windows 8.1, and Windows 7 using reliable methods.
The steps below focus on modern Windows versions while also covering older systems where the icon cache location and reset process are slightly different.
What Is Windows Icon Cache?
The Windows icon cache is a collection of database files that store copies of icons used by the operating system. Instead of loading every icon from the original program file each time, Windows keeps cached versions to improve performance.
This system normally works without any user interaction. However, the cache can become outdated after:
- Installing a new icon theme.
- Changing Windows appearance settings.
- Updating or reinstalling applications.
- Using customization tools such as icon replacement utilities.
- Moving programs between folders or drives.
When Should You Reset the Windows Icon Cache?
You may need to rebuild the icon cache if you notice any of these problems:
- Desktop shortcuts show a blank or generic icon.
- File Explorer displays the wrong application icon.
- New icons do not appear after installing a theme.
- Icons remain unchanged after uninstalling customization software.
- Some folders display incorrect images.
- Windows shows outdated icons for recently updated applications.
Before You Delete the Icon Cache
Before resetting the cache, save your work and close open applications. The process requires restarting Windows Explorer, which temporarily refreshes the desktop and taskbar.
How to Delete Icon Cache Windows 11, Windows 10, 8, and 7
The easiest method is using Command Prompt. This works on Windows 7, Windows 8, Windows 8.1, Windows 10, and Windows 11.
-
1. Open Command Prompt as Administrator
Use an elevated Command Prompt window to rebuild the icon cache.- Press
Win + S. - Search for
Command Prompt. - Right-click it and select Run as administrator.
Windows 11 users can also open
Windows Terminal (Admin)and use Command Prompt commands there. - Press
-
2. Stop Windows Explorer
Close Explorer temporarily so Windows releases the cache files.Enter this command:
taskkill /f /im explorer.exeYour desktop, taskbar, and File Explorer windows will disappear temporarily. This is normal.
-
3. Delete the Icon Cache Database
Remove the cached icon files stored by Windows.For Windows 10 and Windows 11, run:
del /a "%localappdata%\IconCache.db"You can also remove newer cache files with:
del /a "%localappdata%\Microsoft\Windows\Explorer\iconcache*"These commands remove cached icon databases only. Your installed applications and shortcuts remain unchanged.
-
4. Restart Windows Explorer
Load Windows again and allow the cache to rebuild.Run:
start explorer.exeWindows Explorer will restart and begin creating a fresh icon cache.
Manual Method to Delete Icon Cache Windows 11
If you prefer not to use commands, you can manually remove the icon cache files.
-
1. Open the Icon Cache Location
Navigate to the folder containing Windows cache files.Open File Explorer and enter:
%localappdata%\Microsoft\Windows\ExplorerPress Enter to open the folder.
-
2. Close Windows Explorer
Stop Explorer before deleting locked cache files.- Press
Ctrl + Shift + Esc. - Open Task Manager.
- Select Windows Explorer.
- Choose Restart or end the task.
- Press
-
3. Remove Icon Cache Files
Delete only icon cache database files.Delete files beginning with:
iconcacheExamples:
iconcache_16.dbiconcache_32.dbiconcache_idx.db
-
4. Restart Explorer
Allow Windows to rebuild the cache.Open Task Manager again and choose:
File → Run new task → explorer.exe
Windows Version Differences
Windows 11
Windows 11 stores multiple icon cache files inside the Explorer cache directory. The command-line method is usually the most reliable because Explorer may keep some files locked.
Windows 10
Windows 10 uses a similar icon cache structure. The same commands normally work without modification.
Windows 8 and Windows 8.1
Windows 8 systems can use the same Command Prompt method. Some installations may still use the older IconCache.db file inside the user profile.
Windows 7
Windows 7 mainly uses the IconCache.db file. The manual location is:
%localappdata%\IconCache.db
After deleting the file, restart Windows Explorer or reboot the computer to rebuild the cache.
How to Rebuild Icon Cache Using a Batch File
If you frequently customize Windows icons, you can create a simple batch file to automate the reset process.
Create a new text file and add:
@echo off
taskkill /f /im explorer.exe
del /a "%localappdata%\IconCache.db"
del /a "%localappdata%\Microsoft\Windows\Explorer\iconcache*"
start explorer.exe
Save the file as:
ResetIconCache.bat
Right-click the file and choose Run as administrator whenever you need to rebuild the cache.
Common Icon Cache Problems and Fixes
Icons Are Still Incorrect After Reset
Restart Windows completely. Some applications keep their own icon cache separate from Windows Explorer.
Only Some Icons Changed
This usually means Windows has multiple cached resources or the application stores its own icon information.
Custom Icons From Themes Are Missing
Confirm that your icon customization software is still enabled. Deleting the cache only refreshes stored icons; it does not reinstall icon themes.
Windows Rebuilds the Cache Slowly
This is normal after deleting the database. Windows needs time to recreate thumbnails and icon information.
Frequently Asked Questions
Is it safe to delete the Windows icon cache?
Yes. Deleting the icon cache is safe because Windows automatically rebuilds the cache files when Explorer starts again.
Will deleting icon cache remove my installed programs?
No. The process only removes cached icon information. Programs, files, shortcuts, and settings remain unchanged.
How often should I rebuild the icon cache?
You should only rebuild the icon cache when you have icon display problems or after making major icon customization changes.
Does this method work on Windows 7 and Windows 11?
Yes. The commands are suitable for Windows 7, Windows 8, Windows 8.1, Windows 10, and Windows 11, although file locations can differ slightly between versions.
Final Thoughts
Deleting the Windows icon cache is one of the easiest ways to fix incorrect, missing, or outdated icons. Whether you are using Windows 7, Windows 8, Windows 10, or Windows 11, rebuilding the cache can quickly restore normal icon behavior.
For most users, the Command Prompt method is the fastest and safest option. After the cache is rebuilt, Windows will automatically recreate the required files and display fresh icons across the system.